E-Commerce Integration: WooCommerce
The WooCommerce integration allows you to relate products and categories from your WooCommerce store to your CMS content.
This enables you to accomplish a numbers of things such as embedding shoppable products directly within blog posts and implementing featured product/category sections.
In addition to this, the integration can be combined with LexasCMS’s personalisation features, enabling you to show personalised product/category recommendations to each and every customer.
In this guide, we’ll explain how the integration works and then show you how to install, configure and use it.
WooCommerce: Supported versions
The WooCommerce integration for LexasCMS is compatible with any version of WooCommerce that supports version 3 of the WooCommerce REST API.
As present, this includes WooCommerce v3.5 or later.
How does it work?
Under the hood, the WooCommerce integration is actually quite simple. After installation, the WooCommerce application creates and configures an internal content type for each of the supported entities (currently products, product variations and categories).
These content types can then be referenced by LexasCMS’s relationship field type as you would with any of your own content types.
When a relationship is created, LexasCMS will capture the relevant entities ID, to be returned by the Content Delivery API. These IDs can then be used in combination with the WooCommerce API to retrieve the complete data for the related entity.
Prerequisites
In order to use the WooCommerce REST API, you first need to ensure that your Wordpress permalinks are configured to something that is easily human readable.
You can find further details on this in the WooCommerce documentation.
1. Generate WooCommerce API credentials
Before you can install LexasCMS’s WooCommerce application, you first need to generate a set of REST API credentials for WooCommerce.
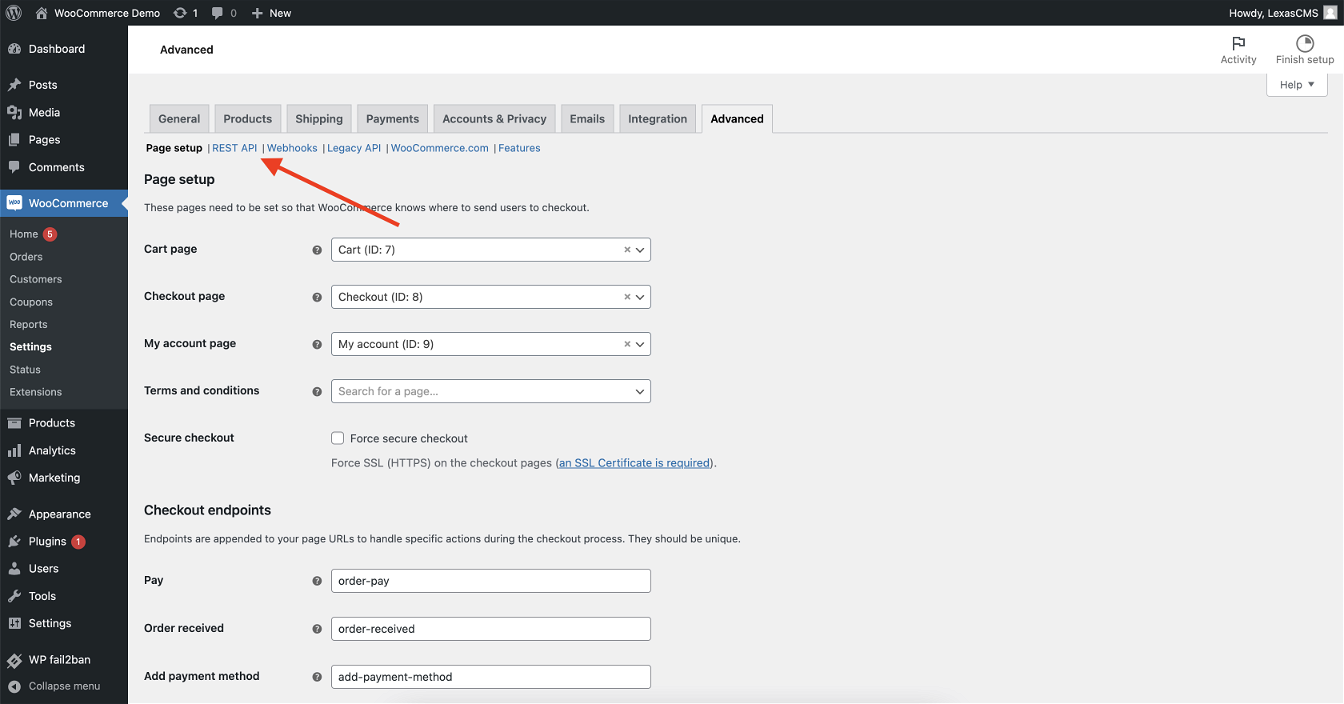
Start by logging into your WooCommerce admin panel, and navigating to the WooCommerce > Settings > Advanced section, and then click on the REST API link in the sub menu.
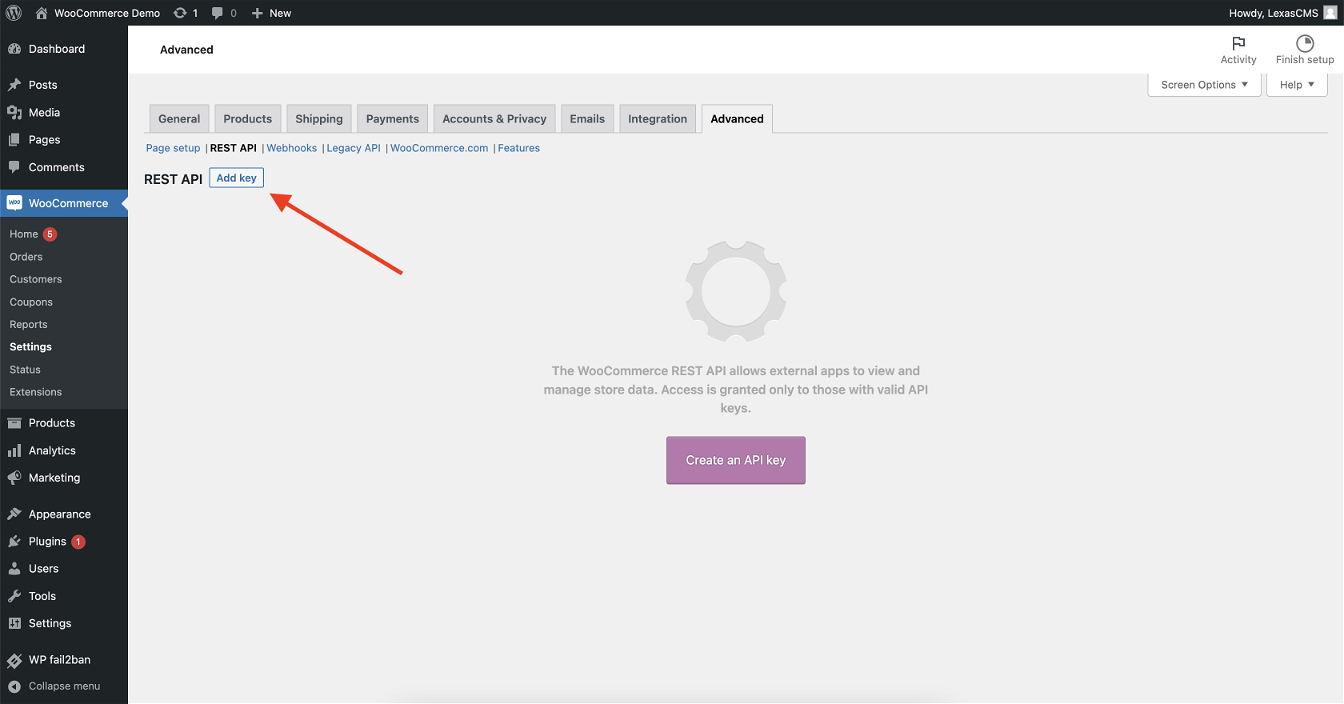
From here, click on the Add key button.
Enter a description and select a user to be designated as the owner of the API key, and then finally set the permissions for the new key to just Read.
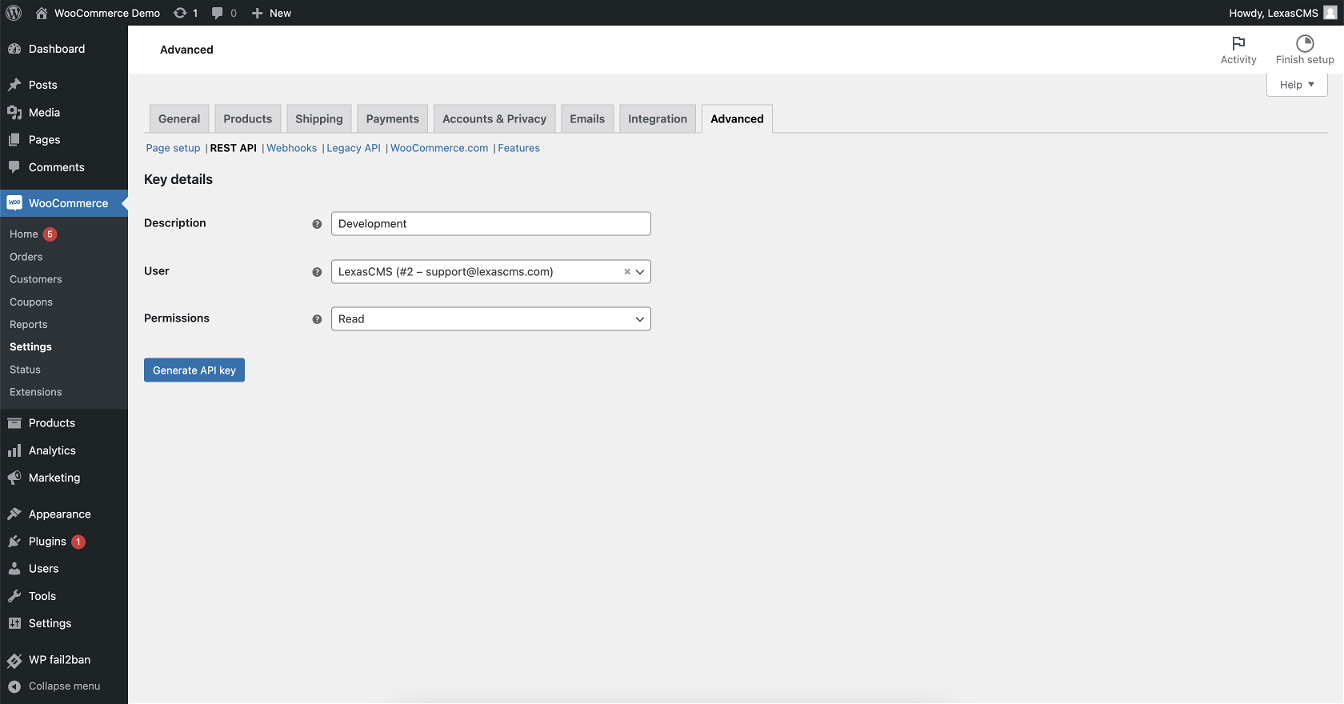
Click the Generate API key button, and once the API key has been created, you’ll be shown a set of credentials.
Copy the Consumer key and the Consumer secret, as you’ll need these in the next step.
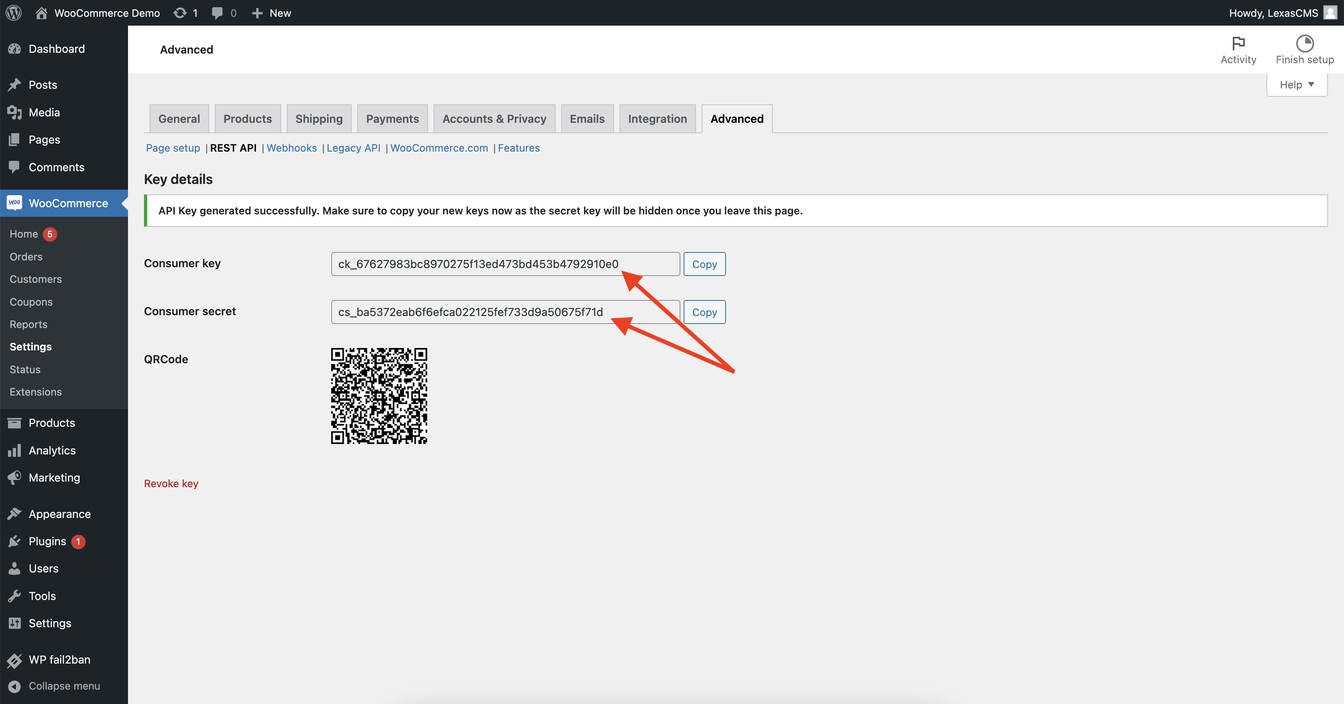
2. Install the WooCommerce application
Once you have your API credentials from the previous step, you’ll need to install the WooCommerce application on your space.
To install the WooCommerce application:
- Navigate to the Settings > Apps section of your space
- Click the Install Application button
- Enter a name for your application
- Select WooCommerce as the application type
- Enter your WooCommerce stores base URL
- Enter the consumer key and consumer secret that you created earlier
- Click the Install Application button
3. Configure your content model
As mentioned earlier, the WooCommerce application defines some new content types for products, product variations and categories.
The new content types are named in the following format:
[Application Name]: [Entity Type]
For example, for an application named My WooCommerce Store, the product content type would be called My WooCommerce Store: Product.
In order create relationships between your WooCommerce entities and your CMS content, you’ll need to create or update a relationship field in one of your own content types to reference at least one of the new content types provided by the application.
This is done from the Configuration tab of a relationship fields configuration modal, in exactly the same way as you would with any other content type.
4. Retrieve data
Once your content model has been updated, any relationships that you create will be returned from the Content Delivery API in exactly the same way as relationships to your own content types.
The only difference is that the relationship data will only contain the ID of the WooCommerce entity, which you can then use to retrieve the latest data from your WooCommerce API.


